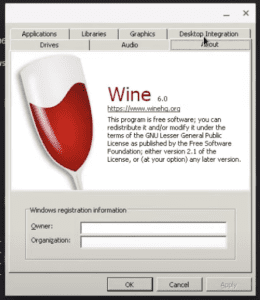
Chromebooks are great devices that are fast reliable, and for the most part fairly affordable. They really are great machines, there is just one downside… You can’t use many of the windows-based apps that you may be used to on your PC or other laptops. If you do want to use these apps in a linux environment you use to have to go through an emulation layer which would be tricky and not the best way to go about it. Now though, we have the latest edition of Wine (6.0) which gives us easy access to window based apps without too much struggle!

What is Wine on Chromebook?
Wine or WINE is not an emulator as the acronym states is a compatibility layer that allows you to access Windows apps through Linux that you wouldn’t be able to access without going through the emulation route otherwise. Using wine on your Chromebook can help you access window-based apps that you would previously not be able to. Using wine on Chromebook helps turn your machine into much more of a complete machine allowing you to get up to whatever you may want with ease.
Why Download Wine onto Chromebook
WINE is a a way for you to access Windows-based apps on your Chromebook, that would not be accesable without it. Most of the use cases come from gamers for the most part. The compatibility layer allows .exe games on Linux and MacOS instead of just using the chromeOS system you can play some older games with the program. Since Chromebooks have their own operating system most users are unable to play many fan-favorite old school games so you have to use the compatibility layer WINE to access and play the games.
The process to download and start running WINE is a bit more difficult than you may have initially thought, so I will go step by step to help you get his compatibility layer on your Chromebook. Then you can start getting going and use WINE to play old games, and for the most part access more with your Chromebook.
How to Download WIne on Chromebook
At the time of writing this, WINE 6.0 has had a stable launch and is up and running! So we are going to follow the steps to download the latest version of the compatibility layer! You can read up about all the new announcements for WINE here!
1. Enable Linux on your Chromebook
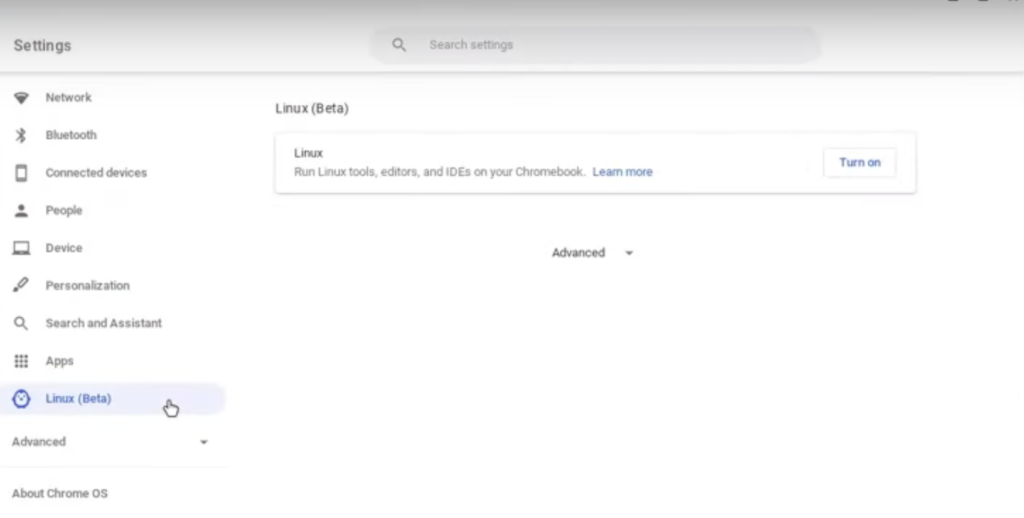
We need to enable 32-bit Linux programs on our device first, so go to your System Settings on your Chromebook then on the left-hand side click on Linux and turn it on with the button on the right-hand side. This will start up a setup wizard, just go ahead and follow through with the steps to enable Linux on your Chromebook.

2. Run Commands in the Terminal
Now that we have Linux enabled on our Chromebook we will need to run several commands in the terminal that pops up.
Here is the List of Commands you will need to copy and paste separately into your terminal:
1) sudo dpkg –add-architecture i386
This first command will allow 32-bit architecture on your Chromebook, which is needed to go through with the download of WINE.
2) wget -nc https://dl.winehq.org/wine-builds/winehq.key
This second command downloads the WINE security key ensuring you have the right security on your Chromebook to go through with the process.


12) ln -s /home/username/.wine/drive_c/users/username/Desktop /home/username/wine
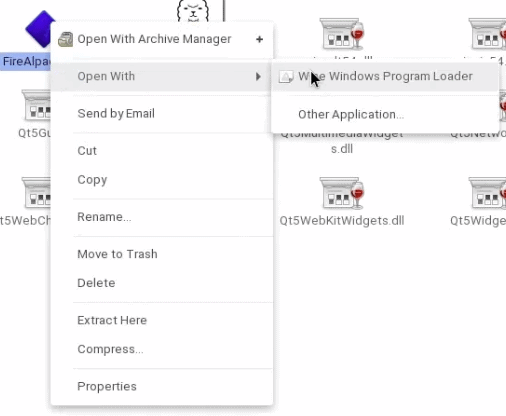
This command allows you to make an app for launching WINE on your Chromebook. To do so copy this command, but replace the username with the username that you used for your Linux apps.
Now you can open and launch apps as you would expect. You should now have in both your FIles and Linux files a 1.mdp file for FireAlpaca, so you can launch your files a bit easier. Now, you can delete all of the files that don’t work. So you can remove the FireAlpaca file that is not labeled 1.mdp as it won’t work now.

James has been a tech fanatic for years, from taking apart old electronics and putting them back together to now learning what more technology has to offer. He constantly is learning more regarding the tech industry. As the creator of Internet Bankroll, his mission is to provide unbiased tech information to everyone!
